
What You’ll Need 4 oz glass bottle 2 tbsp hydrogen peroxide Juice of one large lemon 10 drops of Lemon Essential Oil ORDER HERE 10 drops of an additive Essential…
 What You’ll Need
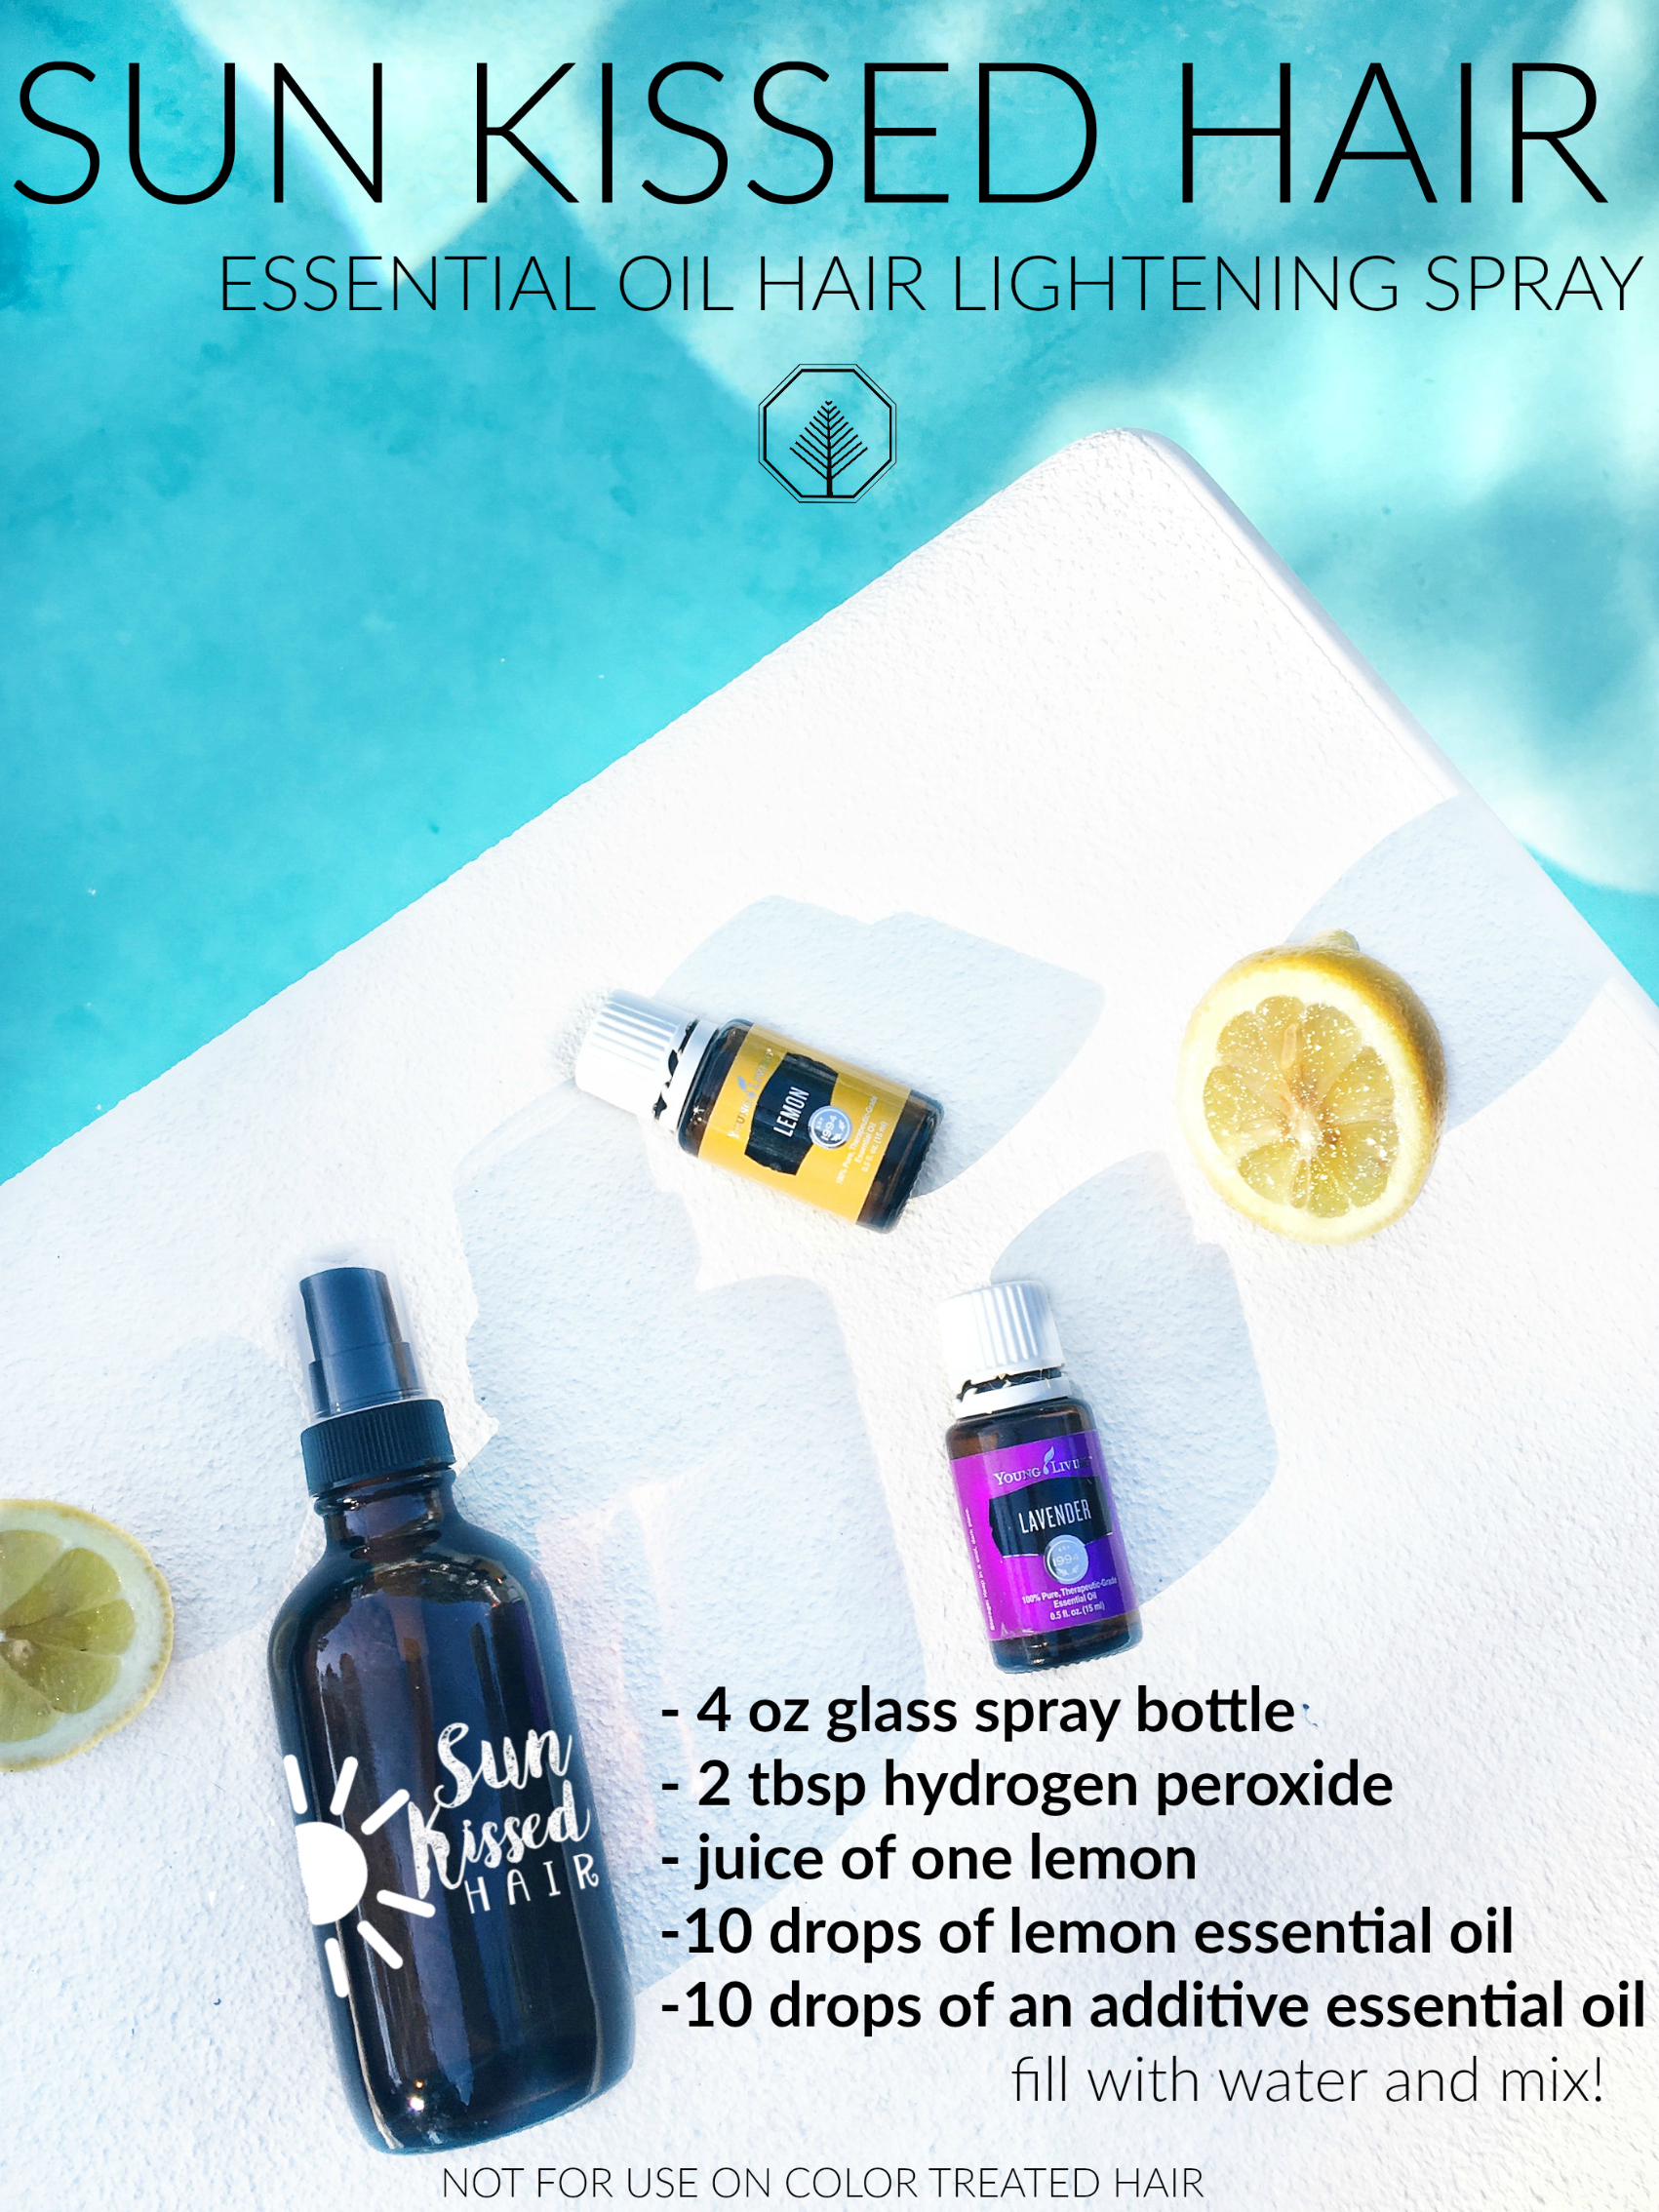
- 4 oz glass bottle
- 2 tbsp hydrogen peroxide
- Juice of one large lemon
- 10 drops of Lemon Essential Oil ORDER HERE
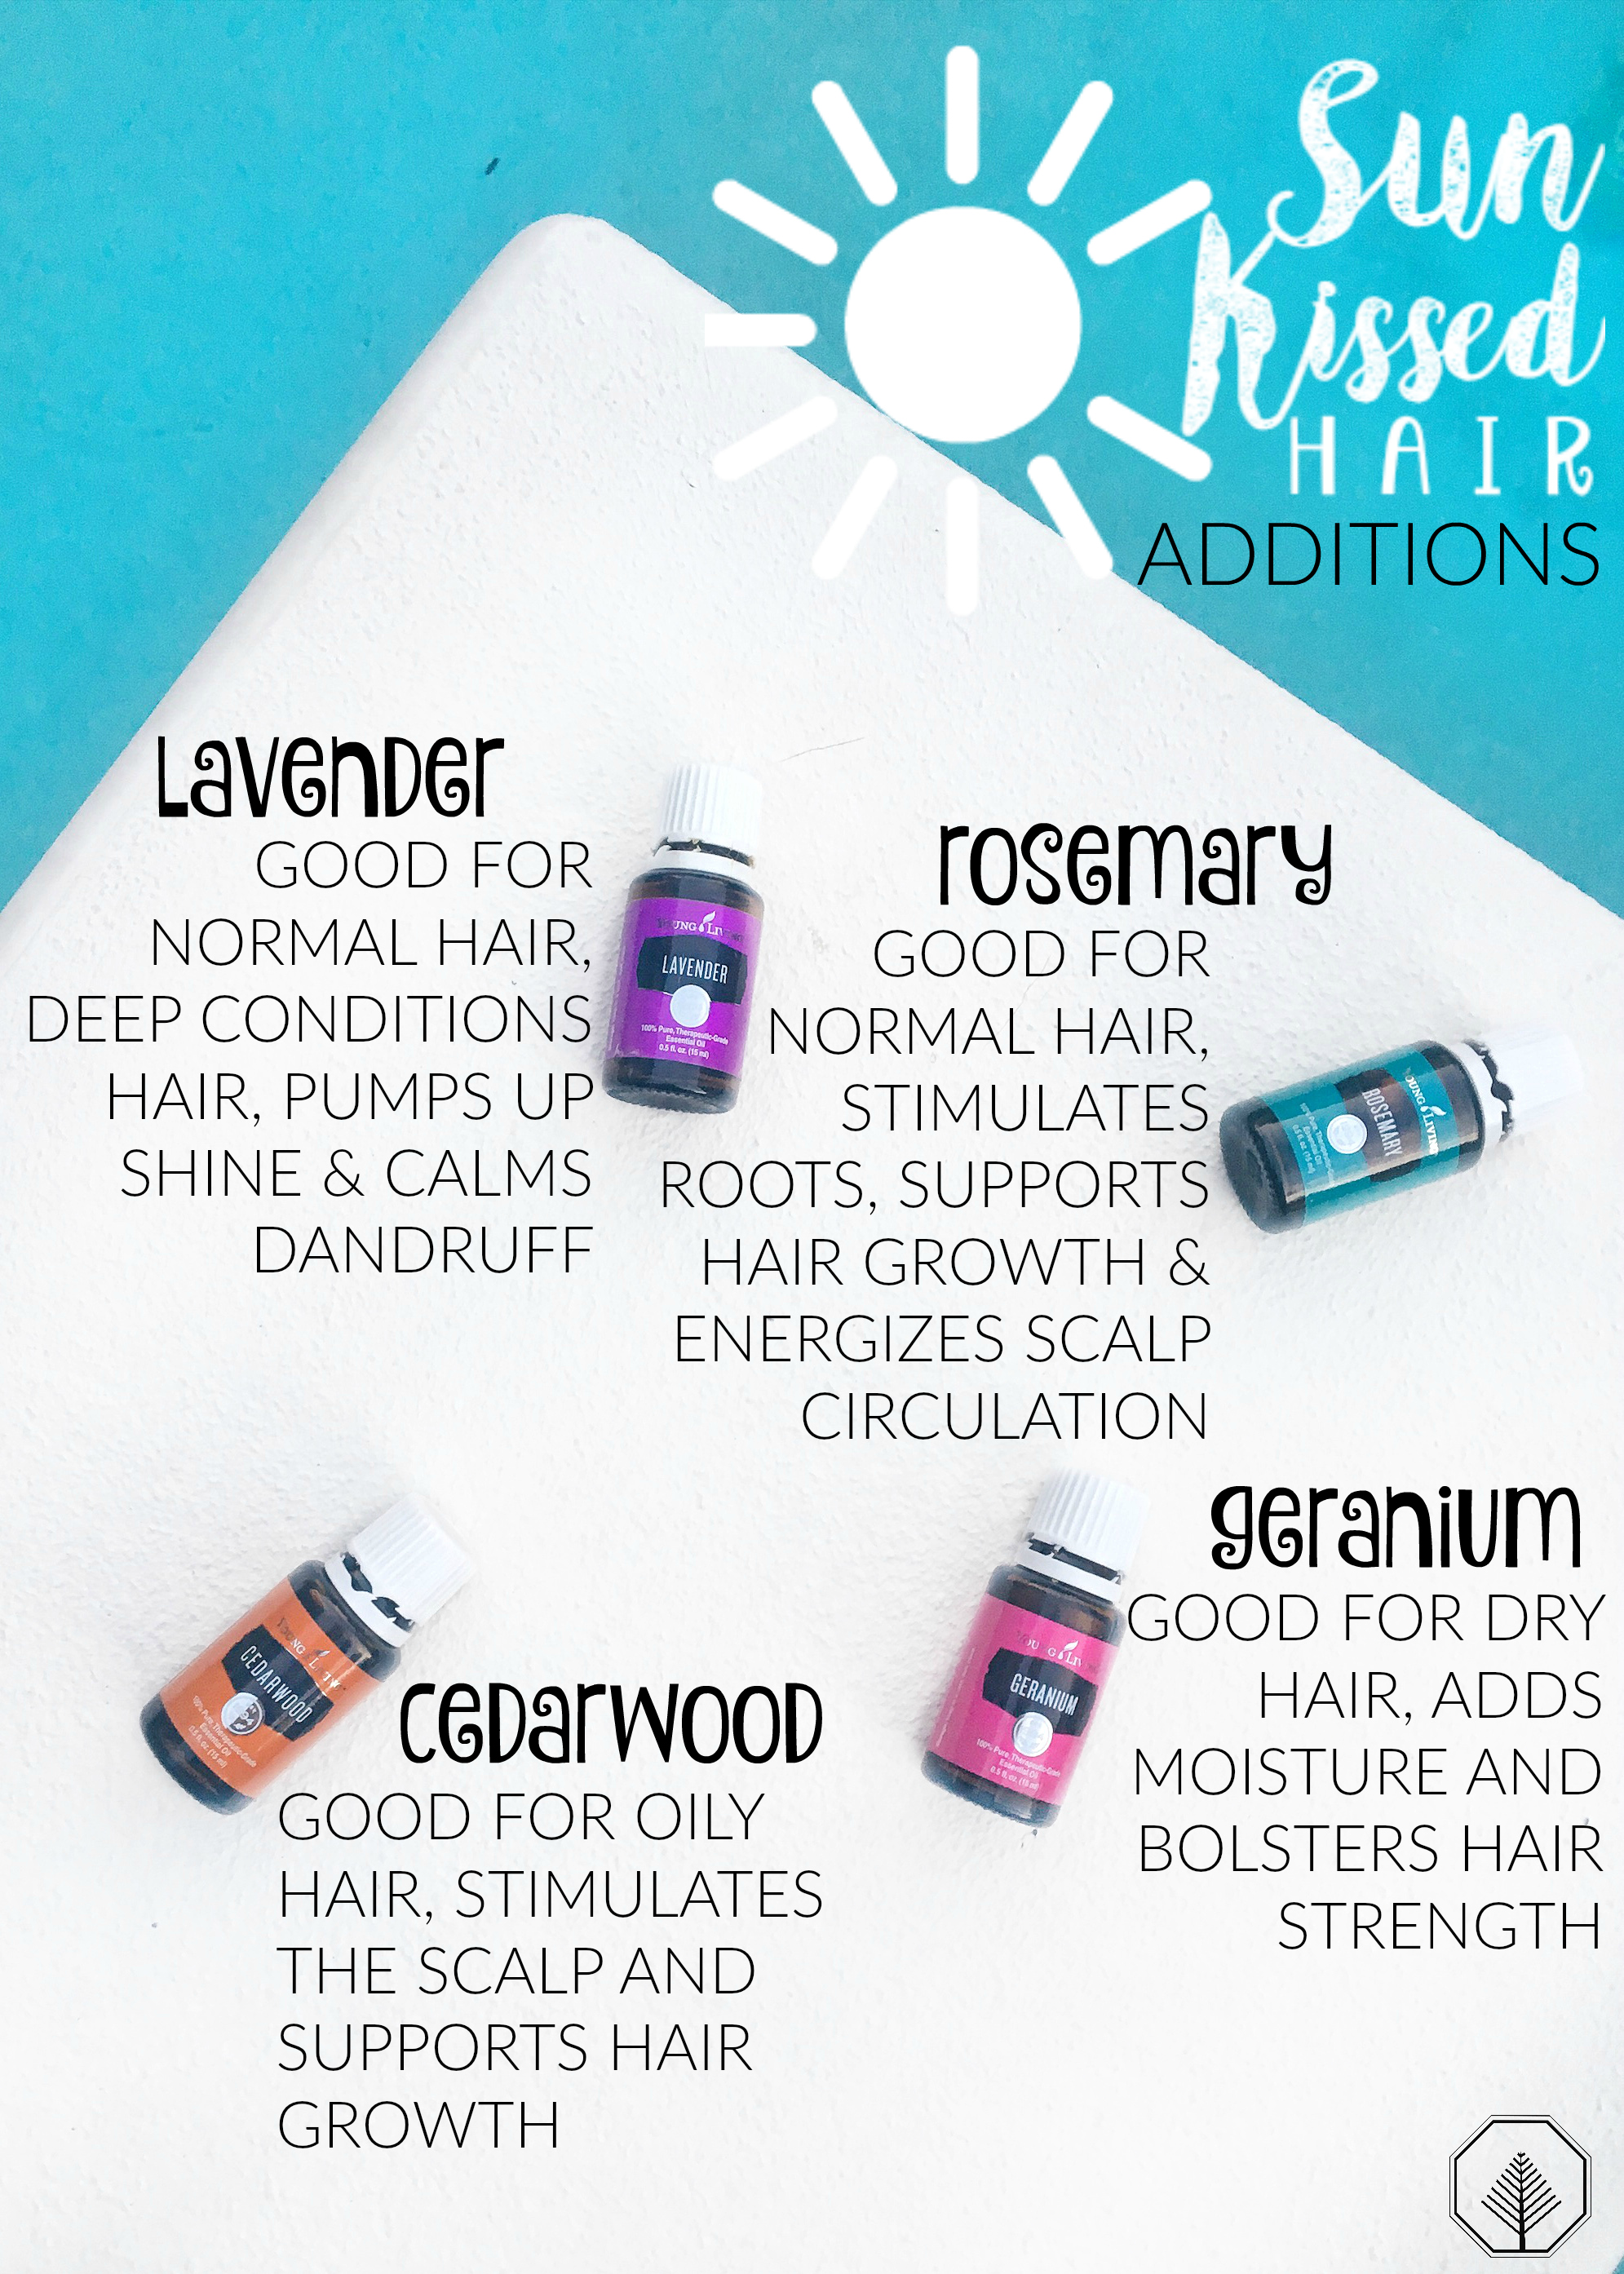
- 10 drops of an additive Essential Oil (see graphic below for some great options

How To
Begin by juicing one large lemon, strain the liquid so there are no particles to clog the mister. Add lemon juice to the bottle. Next, add the hydrogen peroxide and essential oils. I have normal to dry hair so I opted to add Lavender to my spray. This addition not only smells amazing it deep conditions and amps up my shine! Finally, top the bottle off with distilled/filtered water and shake.
Read through the graphic below to decipher which addition would work best for you this summer!
Use
Use on clean hair and avoid getting the spray directly on the skin or scalp. ** If spay gets on skin be sure to wipe off as these ingredients can increase your sensitivity to sun **.
Spray over hair in the spots you would like to lighten and then sit in the sun allowing for even sun exposure. When applying to my hair I found that spraying and then combing through allowed for the liquid to spread evenly throughout.
Warning
Do not use this formula if you have color treated hair! The hydrogen peroxide and essential oils can react to your hair and cause discoloration! This formula is best used on virgin hair from med brown to blonde shades.

Happy Summer Break!
xo,
-C
Disclosure: Please note that some of the links in this post are affiliate links and if you go through them to make a purchase I will earn a small commission.
5,003 Comments on Sun Kissed Hair – DIY Essential Oil Hair Lightening Spray


 Ingredients


 Once your Cricut design is finished confirm that it fits nicely inside the stove cover.


 Beat together eggs and sweetener in a large bowl.


